


Integrating IrisGPT Chatbot on your Zendesk Help Center
Introduction
IrisAgent's IrisGPT Chatbot can power search and Q&A engine on your Zendesk Help Center to deflect customer queries and reduce the number of tickets handled by support agents.
Installation Guide
- Navigate to the Customize Design tab in your Zendesk Help Center. This can be found under Zendesk Guide > Guide Admin > Customize Design.
- Edit your theme. You can either add a new theme by selecting Add theme and making a copy of your Live theme by selecting the three dots > Copy. If you would like to edit your existing theme directly, click on Customize under your Live theme.

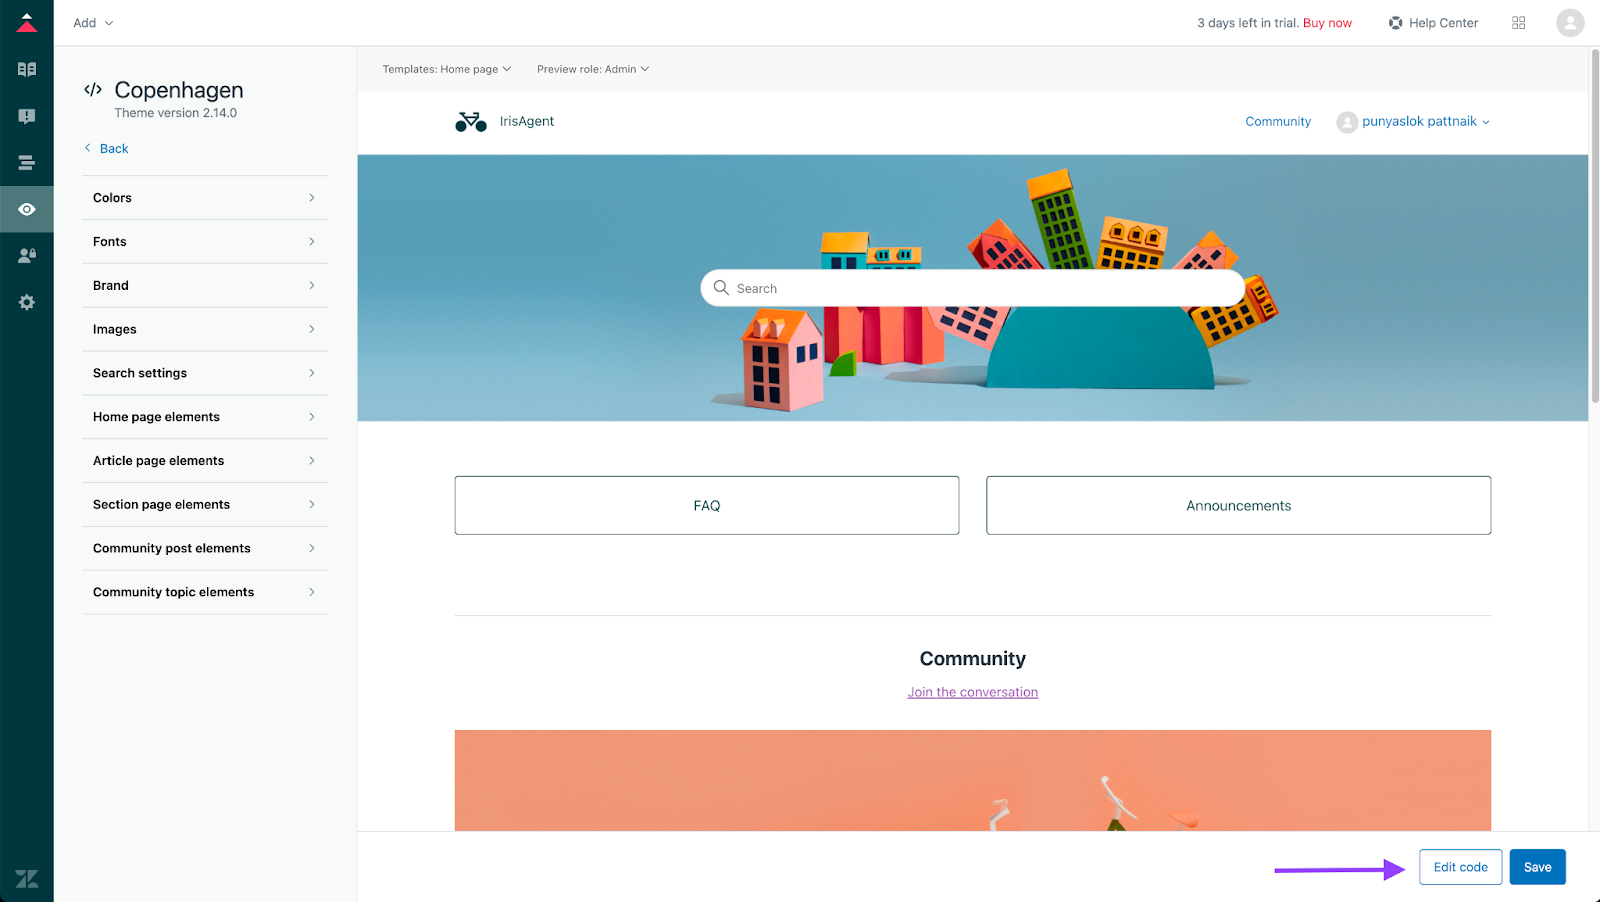
- In order to add the IrisGPT Chatbot to your Zendesk Help Center, you will need to edit the code. After clicking on the Customize button in the previous step, Click Edit Code in the bottom right corner:
- Navigate to the templates on the left hand side, click on the footer (footer.hbs) file.
- Within footer.hbs file, add the code snippet from https://web.irisagent.com/manage-chatbot just before the closing
</footer>tag - Note: You can also manage your IrisGPT chatbot settings from https://web.irisagent.com/manage-chatbot
- Save your work. Click Save.
- If you have Zendesk Messaging Web Widget enabled for your Zendesk account, the messaging widget may block the IrisGPT Chatbot's visibility on the help center pages. To fix this, you can disable the messaging widget from the Zendesk Admin settings.
- Navigate to Zendesk Support Admin Center
- On the left hand side, please find the following section and click on it: Channels > Messaging and Social > Messaging
- If you do not have any channel of type Web Widget, you may ignore the below steps
- Edit the Web Widget channel settings and scroll down to the Installation section
- Ensure that the checkbox named Automatically embed Web Widget in your help center is unselected
- Save the changes. Click Save.
- [optional] You can click on the preview button on the left side of the editor to see how the layout looks before deploying it.
- That’s it, done! You should be seeing the IrisGPT Chatbot on your help center pages at bottom right.